Note : In this tutorial , we will install barman 3.16
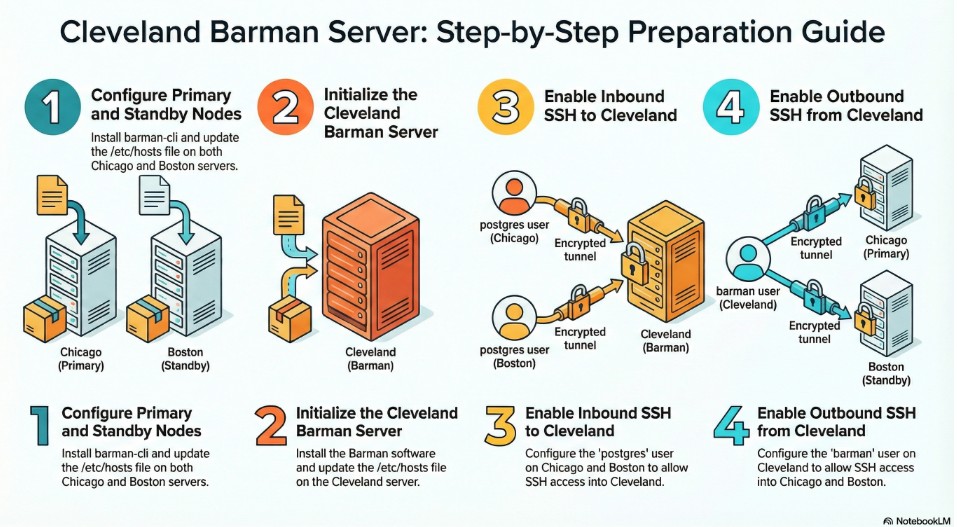
2.3.1 Install Barman-cli and update /etc/hosts – on both Chicago and Boston
where: on both chicago and boston
as user: vagrant
# Step 1: Add the official PGDG repository to access PostgreSQL-specific tools

sudo dnf install -y https://download.postgresql.org/pub/repos/yum/reporpms/EL-9-x86_64/pgdg-redhat-repo-latest.noarch.rpm
# Step 2: List all available barman-cli versions to find our specific target
sudo dnf --showduplicates -y list barman
# Step 3: Install version 3.16.0 specifically to allow for a future upgrade demonstration
sudo dnf install -y barman-cli-3.16.0-42PGDG.rhel9
# Step 4: Verify the installation
barman-wal-archive --version# Step 5: update the host ip addresses in /etc/hosts
sudo bash -c 'cat << EOF >> /etc/hosts
192.168.56.140 chicago
192.168.56.141 boston
192.168.56.142 cleveland
EOF'# Step 6:: Display the contents of public key
sudo cat /var/lib/pgsql/.ssh/id_rsa.pub2.3.2 Install Barman and update /etc/hosts on cleveland (barman)
where: on Cleveland (Barman) server
as user: Vagrant
# Step 1: Add the official PGDG repository to access PostgreSQL-specific tools

sudo dnf install -y https://download.postgresql.org/pub/repos/yum/reporpms/EL-9-x86_64/pgdg-redhat-repo-latest.noarch.rpm# Step 2 : Update /etc/hosts with IP address of Chicago and Boston
sudo bash -c 'cat << EOF >> /etc/hosts
192.168.56.140 chicago
192.168.56.141 boston
192.168.56.142 cleveland
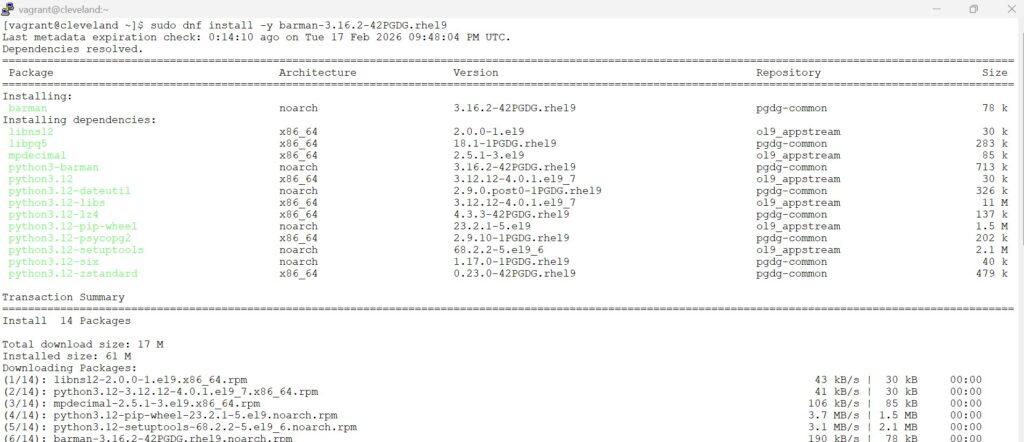
EOF'# Step 3 : List the available Barman versions
sudo dnf list barman --showduplicates # Step 4 : Install Barman specific version
sudo dnf install -y barman-3.16.2-42PGDG.rhel9# Step 5: Verify the installed barman version
sudo barman --versionscreenshot
2.3.3 Enable SSH setup to cleveland from chicago and boston
where: on Cleveland (Barman) server
as user: barman
# Step 1 : switch to barman user in Cleveland server
sudo -i -u barman# Step 2: Generate the ssh keys - accept the defaults - Hit enter whenever you see prompts
ssh-keygen -t rsaNote: Hit enter – 3 times by accepting the defaults .
Copy the contents from section 2.3.1 – Step 6 (from above) – output of both chicago and boston and paste it in cleveland
# Step 3: edit the authorized_keys file in barman server(cleveland) to paste the public key of chicago and boston
vi /var/lib/barman/.ssh/authorized_keysscreenshot
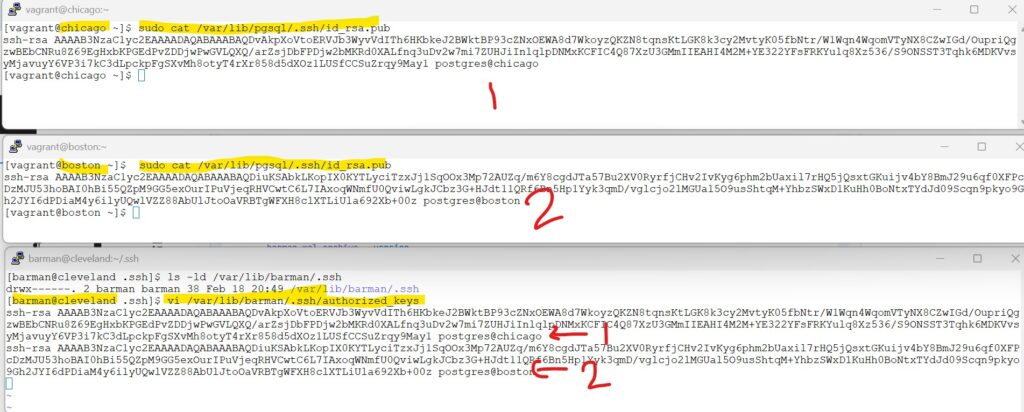
save the file
Note: the public keys are sensitive information and not to be shared / documented in the real world. This demo is purely carried out in local sandbox and most of the best practices in security terms is not considered to give the readers the screenshots at the time of implementation.
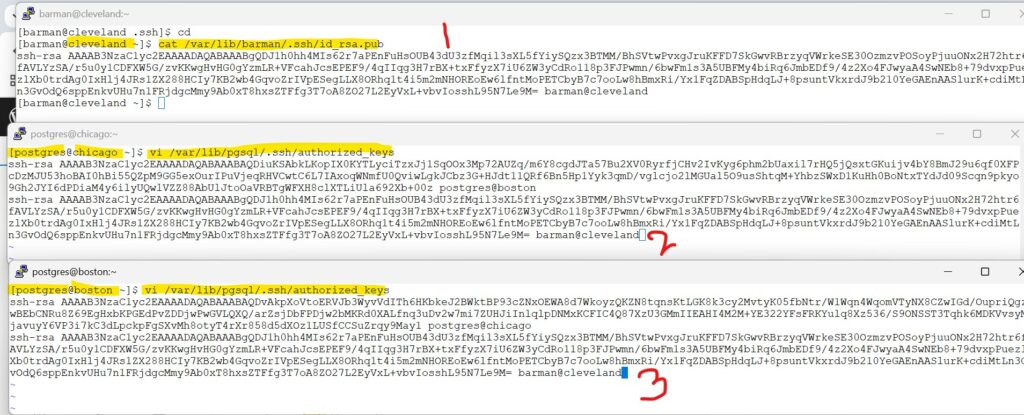
# Step 4 : cat the contents of public key on barman server
cat /var/lib/barman/.ssh/id_rsa.pub2.3.4 Enable SSH setup to chicago and boston from cleveland
where: on both chicago and boston
as user: postgres
# Step 1: switch to postgres user in both chicago and boston
sudo -i -u postgrescopy the output of step 4 from section 2.3.3 in both chicago and boston as postgres user and save the file
# Step 2 : copy the public key of barman user from cleveland (section 2.3.3 step 4)
vi /var/lib/pgsql/.ssh/authorized_keysscreenshot
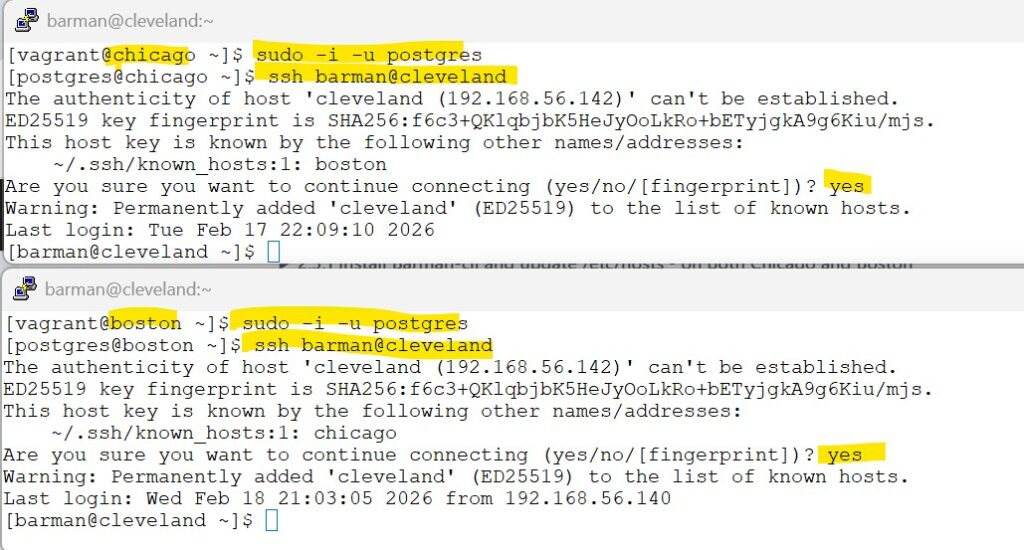
# Step 3: ssh to barman
ssh barman@clevelandNote on both chicago and boston : accept the defaults – and enter Yes when prompted.
screenshot
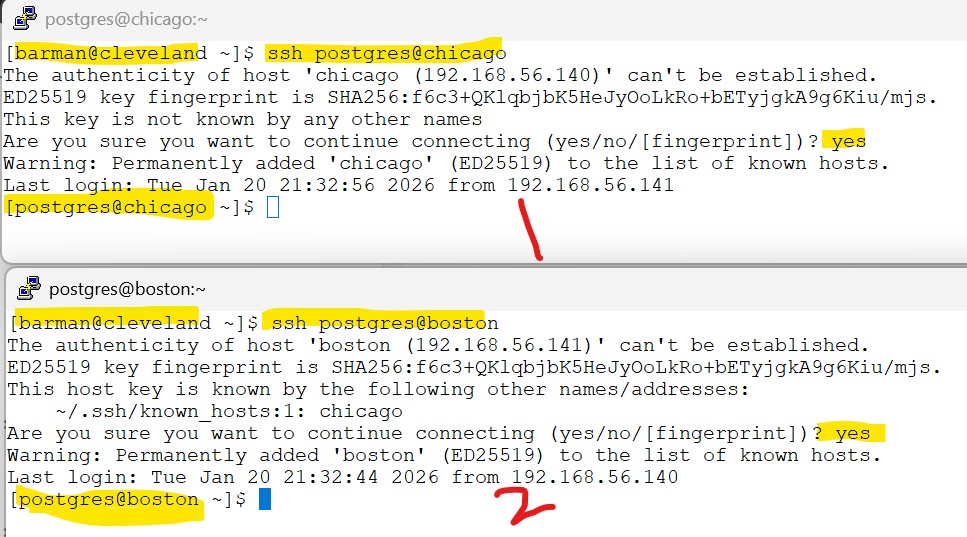
Step 4 is to switch back to postgres user on the DB server(chicago and boston) from cleveland
Now we are connected to cleveland server as barman user.
lets try to switchback to postgres user of both chicago and boston without password prompt.
Accept the defaults , hit Yes when prompted,
see the below screenshot for reference
screenshot
Congratulations, You have successfully completed barman and ssh setup.